Reuse Old MacBook Air (late 2010) as a Linux Machine (Fixing Graphics)


I tried reusing my old MacBook Air late 2010 (MacBookAir3,1) as it got quite slow running on MacOS X. The distribution I chose is Ubuntu Studio 18.10. Although installation of OS is easy, some points that have to be fixed exist and are covered in this article.
Issue of graphics
Regarding graphics, the following issues occur in default configuration.
- noises like scanning lines appears on screen
- Sometimes MacBook cannot be recovered from sleep state (Opening and closing rid several times may work for recovery)
Installing a driver
Appropriate drives must be installed to resolve the issues above, however, installation of driver make a problem.
Issue
Installation itself is available at Setting Manager > Additonal Drivers.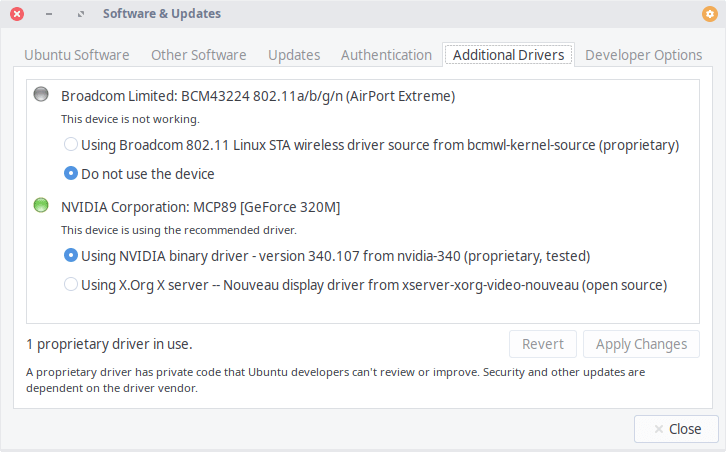
Pre-process before installation of driver
Referring to this page, pre-process before installing the driver should be done. The following is the procedure.
Run the following command and take a memo of the values in Bas info for the row showing ‘display’ and the row just above that row.
$ sudo lshw -businfo -class bridge -class display
Bus info          Device     Class       Description
==================================================
pci@0000:00:00.0             bridge      MCP89 HOST Bridge
pci@0000:00:03.0             bridge      MCP89 LPC Bridge
pci@0000:00:15.0             bridge      NVIDIA Corporation
pci@0000:00:17.0             bridge      MCP89 PCI Express Bridge
pci@0000:02:00.0             display     MCP89 [GeForce 320M]
02:00.0 and 00:17.0 should be recorded for the above example.
Then open the following file.
$ sudo vi /etc/grub.d/01_enable_vga.conf
Write the following content for the file. You should replace 02:00.0 and 00:17.0 part with the content recorded in the previous step.
cat << EOF
setpci -s "00:17.0" 3e.b=8
setpci -s "02:00.0" 04.b=7
EOF
Run the following command at last.
$ sudo chmod 755 /etc/grub.d/01_enable_vga.conf
$ sudo update-grub
Reboot the OS once and then confirm whether the above change is in effect though the following command.
$ sudo setpci -s "00:17.0" 3e.b
08
$ sudo setpci -s "02:00.0" 04.b
07
Then add description to the following file to make brightness control working.
$ sudo vi /usr/share/X11/xorg.conf.d/10-nvidia-brightness.conf
Section "Device"
    Identifier     "Device0"
    Driver         "nvidia"
    VendorName     "NVIDIA Corporation"
    Option         "RegistryDwords" "EnableBrightnessControl=1"
EndSection
Once you finish the all settings, you may install driver and reboot the OS.
Resolving scrambled screen
Sometime you may face scrambled screen after rebooting. Enter GRUB to his ESC continuously just after booting the Mac. Then type exit to exit GRUB and the problem should be resolved while booting the OS. Otherwise repeat the process.
Setting brightness control keys
Above setting looks quite enough to make everything working properly, but my Mac required one more step; brightness control keys are still not working.
Install xbacklight.
$ sudo apt install xbacklight
Then add the following setting at Settings Manager > Keyboard > Application Shortcuts.
xbacklight -dec 10         F1
xbacklight -inc 10         F2
Although what is exactly preferable should be allocating brightness control keys on the MacBook keyboard, brightness control keys will not work properly. The keys may be controlled by another application. This should be investigated more.